
What did I do on my 30th Birthday?? I made a macramé rainbow for my daughter of course! This is such an easy project that does not require much skill or supplies.
This is a great craft to do while watching TV, or parts can be done while riding as a passenger on a roadtrip.
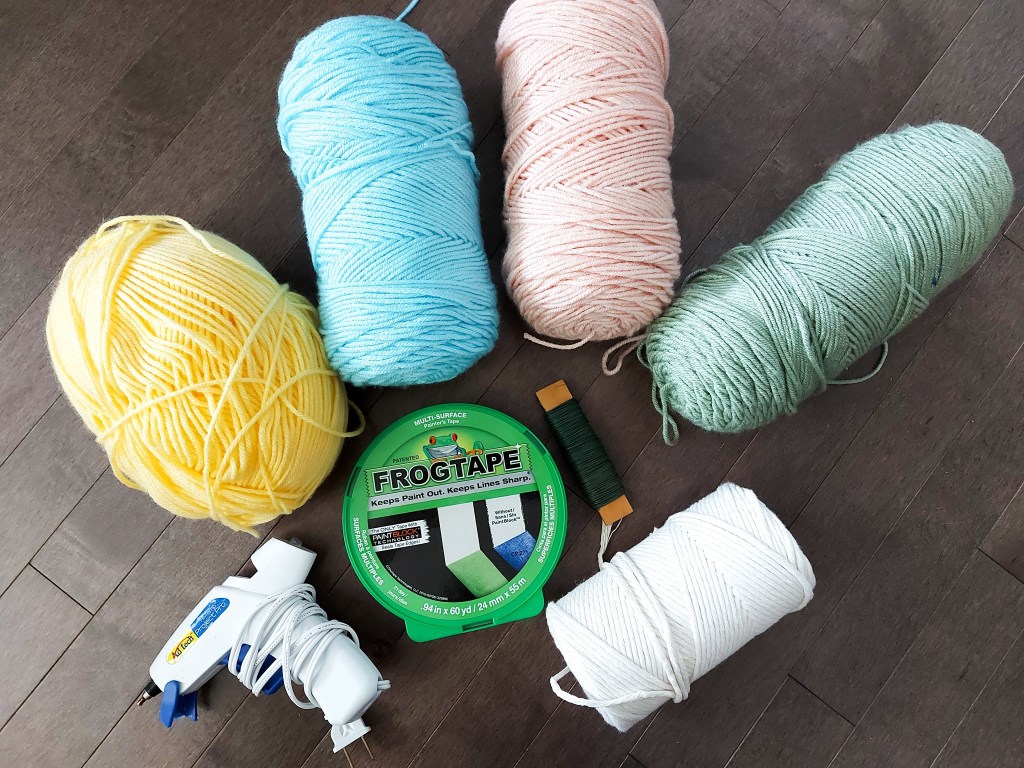
Firstly, gather all your materials:
- 1 roll of macrame cord
- 4 balls of coloured yarn
- thin crafting wire
- masking tape – I used Frog Tape
- Hot glue gun
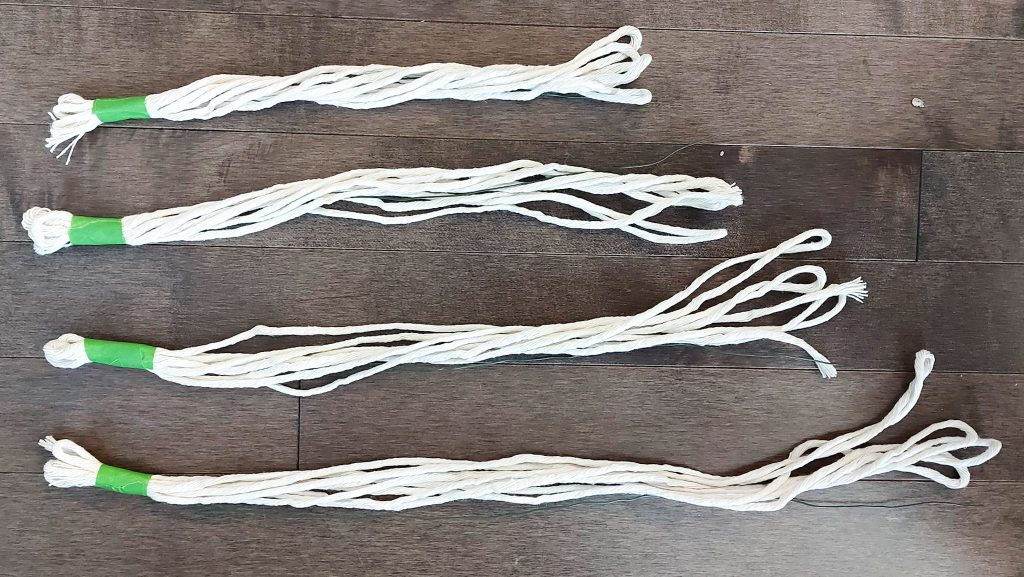
Step 1 – Measuring out and Making your Rainbow Rows
Depending on how thick your macrame cord is, you may need to measure out several layers of cord for each row. Here is how long I made each row:

- Row 1 – 18″
- Row 2 – 16″
- Row 3 – 13.5″
- Row 4 – 12″
I purposefully made my rows slightly longer so that I could trim the macramé to make the tassels the exact length I wanted them. I also doubled up my macramé to have 8 strands in each row to give it the thickness I wanted. Next time, I would start with thicker macramé to make it go faster, however having several strands also helped to hide my wire.
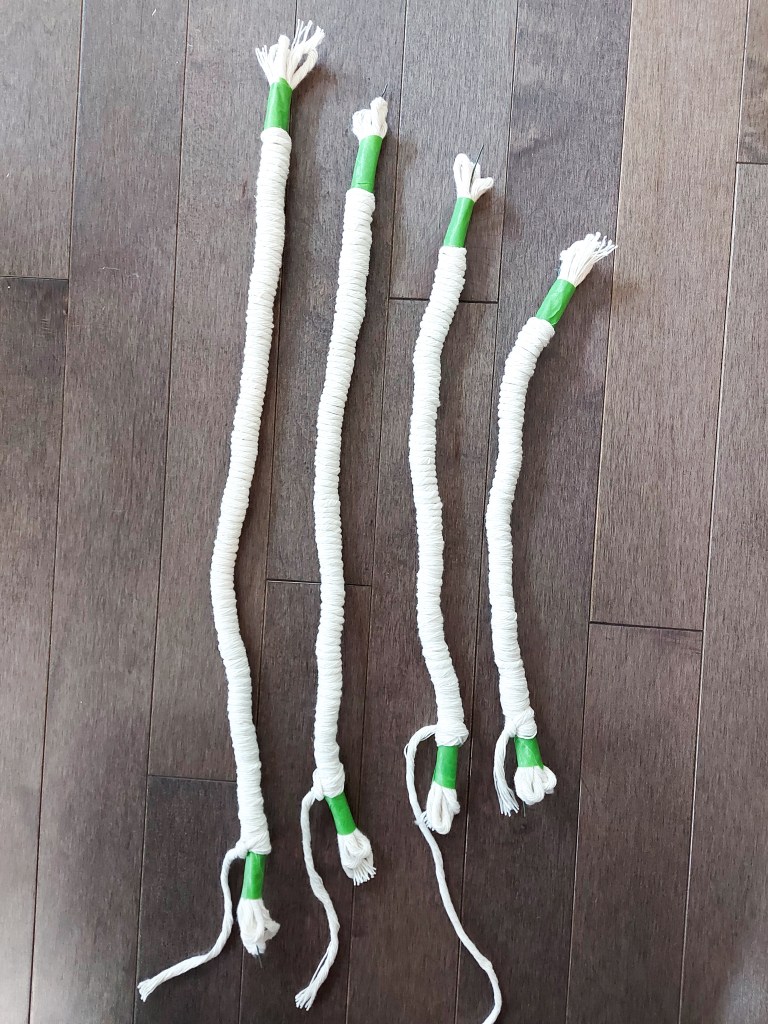
Step 2 – Wrap the cord layers and wire up
First, I taped the cord layers and wire together about 1 and a half inches from the end to hold them together. I then wrapped them all up with a final wrapping of macramé cord. This produced a solid strand of macramé that was now also easy to form into any shape with the wire inside.

Step 3 – Shape your macramé cords into a rainbow.
Shape your macramé rows into the rainbow and adjust the ends of each rows if necessary so that the tassels will all line up.

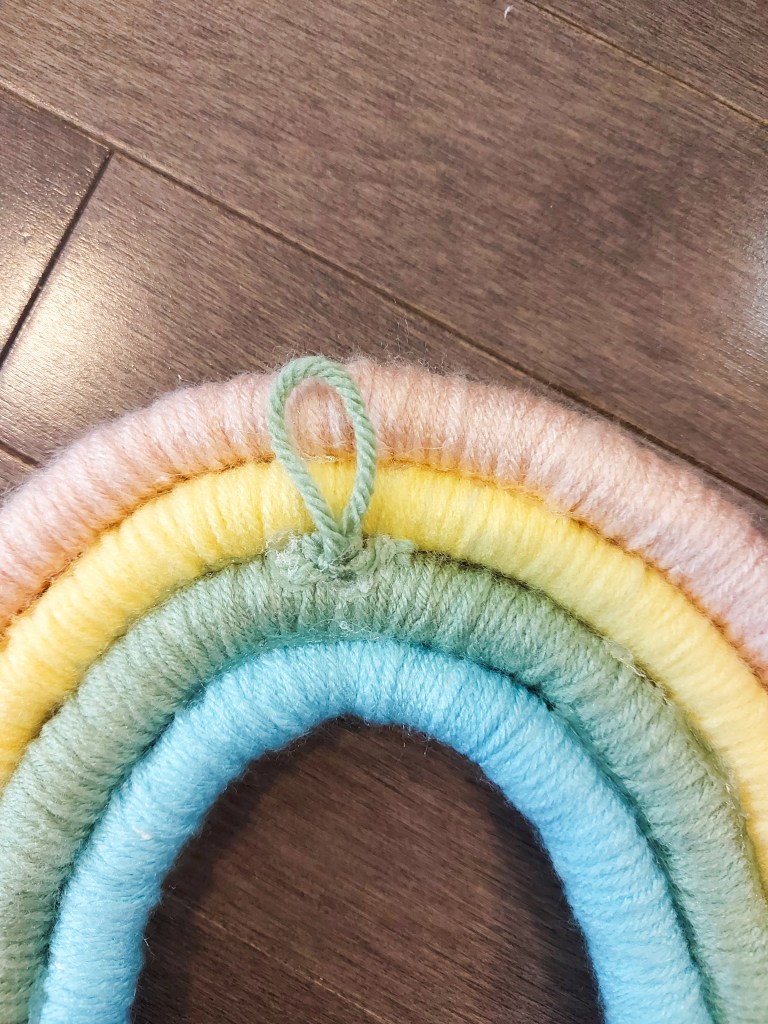
Step 4 – Wrap rows with yarn.
Wrap each row with your choice of yarn for each row. I hot glue gunned the end of my yarn in the inside of each rainbow row so that it would be hidden when the rows are glued together. After all the yarn is wrapped I wrapped another piece of green yarn into a loop around the center of the green row. This is then used to hang the rainbow when it is all done.


Step 5 – Put it all together!
Remove tape and glue rows together. I used a hot glue gun. I then took off my tape and separated the macramé cord with my fingers to make it look frayed and tassely (if that’s a word haha). I trim any tassels that are too long and then voila! You have yourself a rainbow.

Here is some quick directions with no pictures for easy view of the steps!


One thought on “Macramé and Yarn Rainbow”